Knowing how to clean fossils properly starts long before you ever pick up a tool. The real secret? It all comes down to a careful assessment of the fossil and its surrounding rock, known as the matrix.
This first step is all about getting to know your find, understanding its fragility, and setting up a proper workspace. Patience during this initial stage is your greatest tool. Rushing now could erase millions of years of history in an instant.
Preparing for Fossil Cleaning
The moment you pull a fossil from the earth, you’re connecting with a distant past. But the real work of revealing its story—a process called fossil preparation—is just getting started. It’s a delicate art that’s one part patience, one part precision.
Before any actual cleaning begins, you need to play detective. Your first job is to understand both the fossil and the rock that has held it captive for eons. This initial read-through will dictate your entire approach.
Think about it: a delicate trilobite preserved in soft, flaky shale needs a much gentler touch than a hefty dinosaur bone locked in hard sandstone. Getting that judgment call wrong can lead to irreversible damage. If you're new to this, checking a guide on things to look for when collecting fossils can give you a solid foundation for figuring out what you’ve found.
Assess Your Fossil and Matrix
Start by just looking. Get up close and examine the fossil's condition. Are there visible cracks or fractures? Does it feel crumbly or porous to the touch?
Here's a simple trick for testing the matrix hardness: gently try to scratch an out-of-the-way spot with a wooden toothpick. If it leaves a mark, you're likely dealing with soft rock. If not, you've got a harder material on your hands that's going to require more elbow grease.
This stage is all about observation, not action. Look for subtle clues that tell you how the fossil is oriented within the rock. This helps you map out your cleaning strategy, ensuring you work methodically to expose the prize without harming it.
"Fossil preparation is more than just cleaning; it's a careful process of revealing. Every fossil and its matrix are a unique puzzle, and rushing the initial assessment is the most common mistake a collector can make. The rock tells you how to proceed."
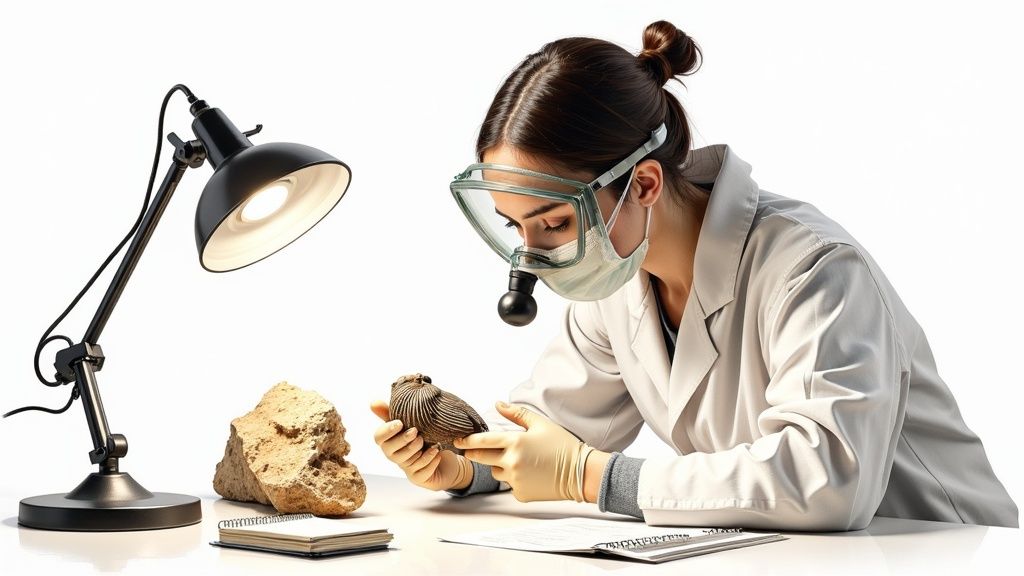
Setting Up a Safe Workspace
Once you've got a good feel for your specimen, the next step is to create an environment where you can work safely and effectively. You don’t need a professional lab—just some thoughtful planning.
Your fossil cleaning station should have a few key things:
Good Lighting: An adjustable desk lamp is a must. Being able to see every fine detail helps you tell the difference between fossil and matrix, which is crucial for preventing accidental scrapes.
Proper Ventilation: Even if you're just dry brushing, you're going to kick up dust and tiny rock particles. Always work in a well-ventilated room or, even better, outdoors to avoid breathing in that fine sediment.
Personal Protective Equipment (PPE): At the bare minimum, wear safety glasses. Rock chips can fly. Depending on the techniques you use later, you might also want to add gloves and a dust mask to your setup.
The craft of fossil prep is practiced all over the world, with countless techniques developed for specific types of finds. The work of preparators in labs everywhere is a critical, and often invisible, step in making fossils ready for study and appreciation.
Building Your Fossil Preparation Toolkit
Once your workspace is ready, it's time to assemble your toolkit. You don't need a high-tech laboratory to get started, but having the right equipment is the difference between a successful fossil prep and a frustrating mess that could ruin your find.
Your toolkit can be as simple or as specialized as you like, and it will naturally grow with your experience. The key is to begin with the basics and understand what each tool is truly for. A good foundation is a clean, organized surface; many serious collectors and preparators use a stainless steel lab table because it's durable and easy to keep free of dust and debris.
Assembling the right tools is a critical step in fossil preparation. The following table breaks down the essentials, from basic hand tools for beginners to more specialized equipment for advanced work.
Essential Fossil Cleaning Toolkit
Tool Category
Specific Tools
Primary Use
Best For
Hand Tools
Dental Picks, Probes, Pin Vise with Needles
Precision removal of matrix in small crevices.
Beginners & Experts; delicate fossils like trilobites.
Brushes
Soft Toothbrushes, Stiff Nylon Brushes
Sweeping away loose dust and scrubbing softer matrix.
Beginners & Experts; general surface cleaning.
Magnification
Jeweler's Loupe, Magnifying Desk Lamp, Microscope
Viewing the fine boundary between fossil and matrix.
All levels; a desk lamp is a great starting investment.
Adhesives
Cyanoacrylates (e.g., PaleoBond), Consolidants
Stabilizing cracks and reattaching broken pieces.
Intermediate & Experts; fragile or fractured specimens.
This toolkit provides a solid foundation for anyone serious about cleaning and preserving their fossil finds, ensuring you have the right instrument for each stage of the process.
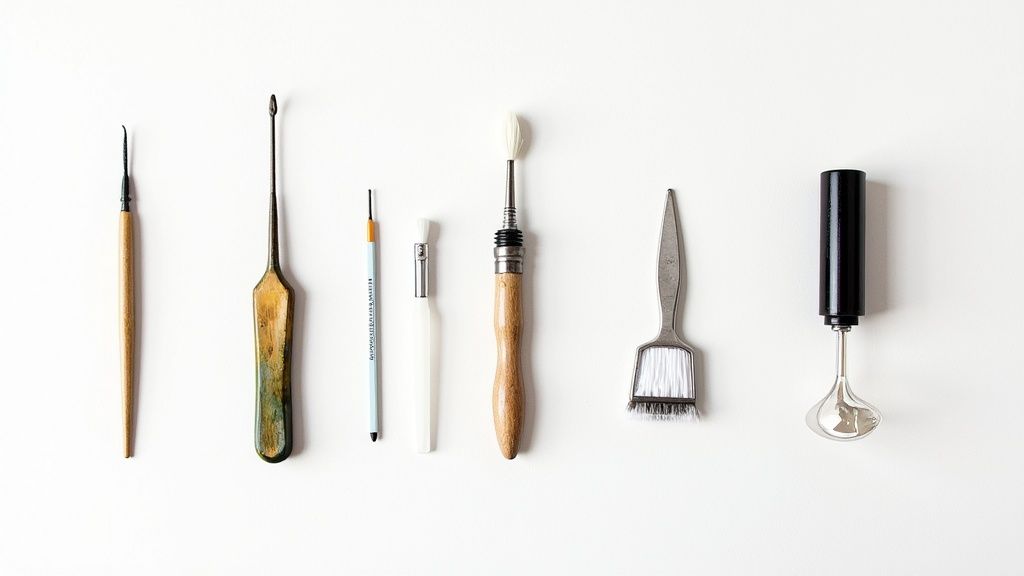
Fundamental Hand Tools for Every Collector
The core of any prep kit is a handful of essential tools designed for precision and control. These are the instruments you'll reach for constantly, especially when working with fossils embedded in softer matrix like shale or crumbly sandstone.
Think of these tools as extensions of your own hands, allowing you to carefully persuade the rock to release the fossil, grain by grain.
Dental Picks and Probes: These are the unsung heroes of fossil cleaning. Their sharp, fine points are perfect for getting into tiny crevices and flicking away small pieces of matrix without applying too much force.
Brushes: You'll want a variety. A soft-bristled toothbrush is great for gently sweeping away loose dust, while stiffer nylon brushes can tackle more stubborn (but still relatively soft) material.
Pin Vise with Needles: This is a small hand drill that holds very fine needles. It gives you incredible precision for detailed work, like clearing the matrix from the delicate spines of a trilobite, offering far more control than just holding a pin in your fingers.
Your most important tools are patience and a light touch. The goal is to gently persuade the rock to give up the fossil, not to force it out. Rushing is the #1 cause of broken specimens.
Seeing Clearly: Magnification and Lighting
You can't clean what you can't see. Proper magnification is non-negotiable for serious fossil work because it reveals the subtle, often invisible boundary between the fossil and the surrounding rock.
Good lighting goes hand-in-hand with magnification. An adjustable lamp lets you change the angle of the light, creating shadows that highlight the fossil's topography and make it much easier to see where to work next.
For magnification, you have a few options:
Jeweler's Loupe: A small, portable magnifier perfect for quick inspections in the field or at your desk.
Magnifying Desk Lamp: This is an excellent investment, combining bright, focused light with a magnifying lens. It frees up both of your hands to hold the fossil and your tools.
Microscope: For microfossils or extremely detailed prep work, a stereoscopic microscope is the ultimate tool, providing an unmatched level of detail.
Adhesives and Consolidants for Stabilization
Sometimes, a fossil is just too fragile to survive the cleaning process on its own. It might be cracked, crumbly, or prone to flaking. This is where adhesives and consolidants become your fossil's support system.
PaleoBond is a well-known brand of cyanoacrylate (super glue) used by paleontologists. It comes in various viscosities, from watery liquids that can wick deep into hairline fractures to thicker gels for filling gaps. A good starter kit will include a penetrant for stabilizing porous areas and a structural adhesive for reattaching broken pieces.
Using these products correctly is a skill in itself. The idea is to apply just enough to secure the fossil without creating a glossy, unnatural coating. Always test a consolidant on a scrap piece of matrix first to see how it reacts. Just as identifying minerals requires a keen eye—something our crystal identification guide can help with—understanding how your materials interact with a specimen is crucial.
Getting Your Hands Dirty: Fossil Cleaning Techniques
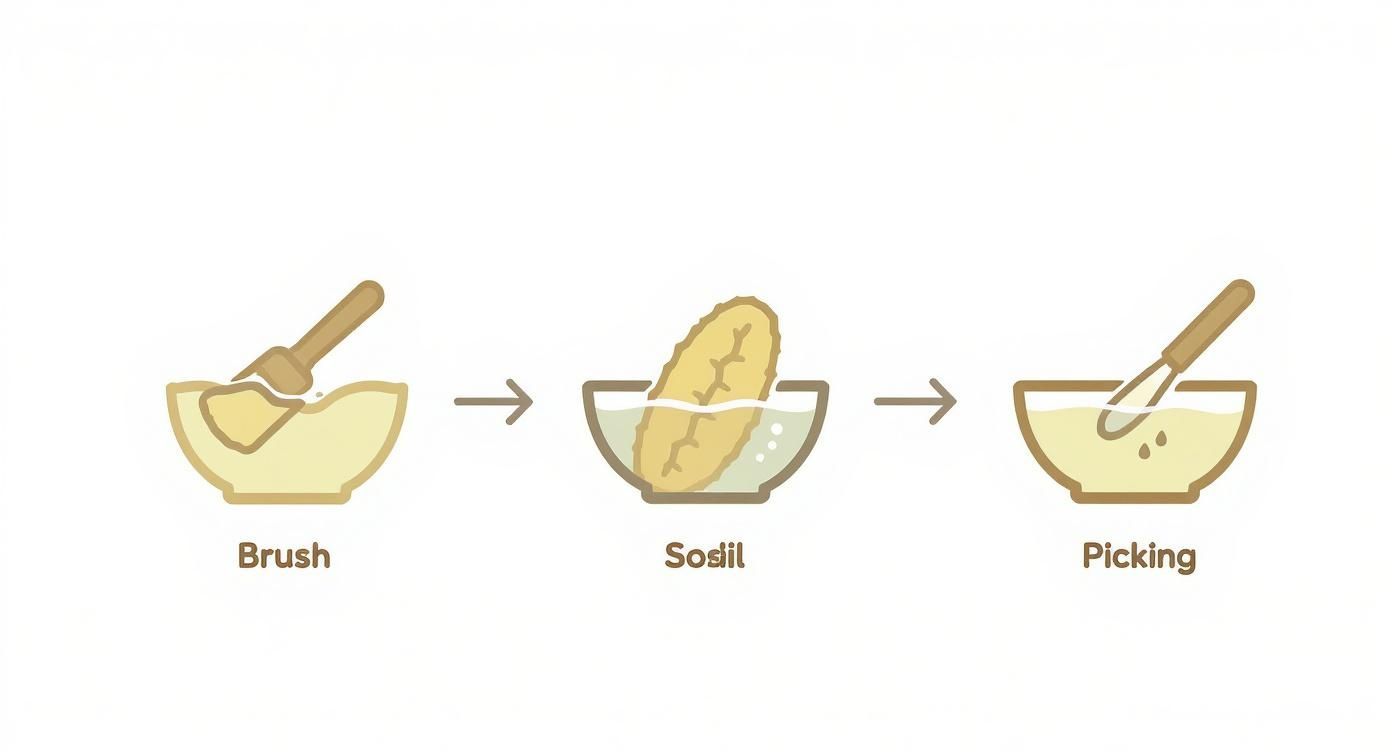
You've got your fossil identified and your toolkit is ready to go. Now for the fun part—carefully revealing the specimen hidden in the rock. The single most important rule in fossil preparation is to start with the least aggressive method and only move on to something more powerful if you absolutely have to.
Think of yourself as a micro-excavator, not a cleaner. This is a slow, deliberate process, and patience is your best friend. Every fossil is a unique puzzle. You might have a clam in soft clay that needs nothing more than a delicate dusting, or you could be facing an ammonite cemented in hard limestone that will take hours of meticulous work. The techniques below are your foundation for handling whatever comes your way.
Start with a Dry Brush
Before you even think about water or sharp tools, your very first step should always be dry brushing. It’s the safest way to remove all the loose dirt, dust, and crumbly bits of matrix without putting a single scratch on the fossil's surface—as long as you use the right brush.
Grab something incredibly soft, like a camera lens brush or a fine-bristled artist's paintbrush. Work your way across the surface with gentle, sweeping motions. The goal here is just to clear away the debris that comes off without any real effort. You might be surprised by how much of the fossil appears after just this one step.
As you work, frequently blow the dust away or use a small can of compressed air to keep the surface clear. This lets you see the crucial boundary between the fossil and the rock, so you don't accidentally get too aggressive on a delicate detail.
Using Water for Softer Matrix
If dry brushing just isn't cutting it, water can be a fantastic next step for softening up tougher, clay-based rock. But this is a critical moment where you must be sure about your fossil type. For many fossils, water is a huge help; for others, it's a destructive nightmare.
Crucial Warning: Never, ever use water on pyritized fossils (often called "fool's gold" fossils). The combination of pyrite (iron sulfide), water, and oxygen kicks off a chemical reaction that will literally cause the fossil to crumble into dust. Fossils from famous locations like the London Clay are often pyritized and extremely fragile.
For stable specimens like well-mineralized bones or shells stuck in a clay or soft shale matrix, a gentle soak can work miracles.
First, place the fossil in a container of distilled water. Tap water is full of minerals that can leave ugly deposits on your find.
Let it soak for a few hours. Water will seep into the porous matrix, causing it to soften and expand.
After the soak, use a soft toothbrush or a stiff nylon brush to gently scrub at the softened matrix. You should see it start to flake or dissolve away pretty easily.
You might need to repeat the soak-and-brush cycle several times. Just be patient and let the water do most of the work for you.
Remember, this approach is only for non-porous fossils in a soft, permeable matrix. If your fossil is riddled with cracks, water can get inside and break it apart from within. When in doubt, always test on a tiny, hidden spot first.
Mastering Hand Tools for Precision Work
When the rock is too hard for water and brushes, it’s time to bring out the hand tools. This is where your dental picks, scribes, and pin vises earn their keep. This stage of preparation demands a steady hand and a deep well of patience, as you'll be removing the matrix almost grain by grain.
The core principle is to work from an exposed area of the fossil outward into the unknown matrix. This keeps your tool moving away from the specimen, dramatically reducing the risk of a slip that could gouge the fossil’s surface. A good magnifying lamp isn't optional here—it's essential for seeing the subtle differences in texture and color that separate the fossil from the rock.
Here's a great pro-tip: listen while you work. The sound your tool makes changes when it moves from the matrix to the fossil. The rock might make a dull, gritty scratching sound. But the fossil, which is often denser and more crystalline, will produce a higher-pitched "tink" or "zing." This auditory feedback is an incredible guide, helping you feel where the fossil begins long before you can see it clearly.
Exploring Advanced Preparation Methods
So, you've tried soaking and scrubbing, but your fossil is still locked away in solid rock. When the gentle approach isn't enough, it’s time to step up to advanced fossil preparation. This is where the real magic happens, especially for specimens trapped in stubborn materials like dense limestone or ironstone concretions.
To free these hidden treasures, we turn to more powerful techniques like air abrasion and controlled chemical treatments.
These methods are a serious step up. They demand more skill, a bigger investment in equipment, and an unwavering commitment to safety. They aren't for the weekend hobbyist just starting out, but understanding them is crucial for anyone serious about the craft. It helps you recognize when a project is beyond your current toolkit and might be better left to a professional.
The Power of Air Abrasion
Think of it as a tiny, hyper-precise sandblaster. That's essentially what an air-abrasive unit—often called an "air pen" or "air scribe"—is. This tool shoots a focused stream of compressed air and fine powder through a small nozzle, carefully blasting away the surrounding rock, or matrix. It’s perfect for both removing bulk material and doing delicate, detailed work right up to the fossil's edge.
The beauty of this method is its fine-tuned control. You can adjust two main variables to match the fossil you're working on:
Air Pressure: Cranking up the pressure (PSI) removes matrix quickly, but it’s aggressive. A lower pressure gives you a much gentler touch, which is essential when you're working close to the fossil's surface.
Abrasive Media: The type of powder you use is just as important as the pressure. Different media are suited for different types of rock and fossil fragility.
This infographic gives a great overview of the cleaning process, showing how you should always start with the most gentle methods first.
It’s a visual reminder of the golden rule: start with a soft brush before you even think about bringing out the bigger guns.
Choosing Your Abrasive Powder
The powder you load into your air pen is absolutely critical. If you use an abrasive that's harder than the fossil itself, you can destroy your specimen in seconds. The goal is to find a medium that's harder than the matrix but softer than the fossil, so it selectively wears away only the rock.
Here are a few of the most common options you'll encounter:
Dolomite Powder: A relatively soft abrasive. It’s excellent for delicate fossils where preserving every fine surface detail is the top priority.
Aluminum Oxide: This one is much harder and more aggressive. It's fantastic for chewing through very hard matrix quickly but requires extreme caution when you get near the fossil.
Sodium Bicarbonate: Basically just baking soda. It's an incredibly gentle abrasive, often reserved for cleaning very fragile or pyritized specimens that can't handle anything harsher.
Air-abrasive tools have become standard issue in modern paleontology labs. Research published by Cambridge University Press reveals that professional preparators use larger nozzles and higher pressure for bulk removal before switching to finer settings for detail work. Their selection of powders—like aluminum oxide, sodium bicarbonate, and dolomite—is always carefully matched to the job. You can dig into these professional air-abrasive fossil preparation findings to see exactly how the pros do it.
A Cautious Look at Chemical Methods
Chemical preparation uses acids or other chemicals to literally dissolve the matrix away from a fossil. This can be an astonishingly effective technique, especially for freeing tiny microfossils or specimens with complex, three-dimensional shapes from carbonate rocks like limestone.
However, this method is by far the most dangerous and demands serious expertise and safety measures.
Extreme Caution Advised: Working with acids is no joke. It requires a fume hood for proper ventilation, personal protective equipment (PPE) like acid-resistant gloves and goggles, and a solid understanding of chemical safety. This is a technique best left to experienced professionals.
Buffered acetic acid is often the chemical of choice. "Buffering" the acid helps neutralize it as it dissolves the rock, which protects the fossil from being etched or completely destroyed. It's a slow, painstaking process that can take weeks of careful soaking, rinsing, and checking under a microscope. One mistake can mean the total loss of the specimen.
Techniques for Microfossils and Fragile Finds
When you're dealing with microfossils or specimens so delicate they look like they might just turn to dust, your usual cleaning toolkit won't cut it. These tiny, fragile finds demand a completely different approach where preservation is everything. This isn't about scrubbing away rock; it's a delicate process of persuading a stubborn matrix to release its secrets without destroying them.
You have to move beyond mechanical tools and into the realm of chemistry and microscopy. For fossils locked in a heavy clay matrix, like certain shales, even the most diluted acid can be far too destructive. The real goal is to find a method that breaks down the surrounding rock while leaving the microscopic treasures perfectly intact.
Using Surfactants for Delicate Extraction
One of the most effective, yet gentle, methods for these tricky fossils involves using surfactants. Think of a surfactant as a powerful, specialized detergent that works its way between tiny clay particles and pries them apart. This chemical approach is remarkably gentle, breaking down a clay-rich matrix without the harsh, corrosive action of acids.
This technique is a lifesaver for preserving organic-walled microfossils or fossils with delicate, three-dimensional structures. An acid bath would likely dissolve these fragile forms into oblivion, but a surfactant solution simply helps the clay disaggregate, essentially making it fall apart on its own over time.
According to a study published in the peer-reviewed journal Palaeontologia Electronica, using a surfactant for microfossil extraction from clay-heavy rocks was dramatically more efficient than traditional acid digestion. The new method broke down samples in just 10 days—a huge improvement over the months it could take with acid. Even better, it yielded a higher fossil content with better preservation, especially for delicate 3D specimens. You can dig into the full study about this innovative microfossil extraction method to see the data for yourself.
The most precious finds are often the most fragile. Your cleaning technique should be chosen not for its speed, but for its gentleness. The aim is to reveal history, not erase it.
Specialized Handling Under the Microscope
Working with microfossils is a whole other world. Forget your workbench—all your work will be done under a microscope, and your tools will shrink accordingly. Instead of dental picks and chisels, you’ll be using single-bristle brushes or even sharpened porcupine quills for the ultimate level of precision.
Here are a few specialized techniques for handling these tiny specimens:
Fine-Tipped Brushes: A tiny brush, wetted with just a drop of water and trimmed to a few bristles, can be used to gently lift and move individual microfossils from sorted sediment into a storage slide without crushing them.
Coating for Visibility: Sometimes, the fine details on a fragile fossil are almost impossible to see. A very light, temporary coating of ammonium chloride vapor can be used to whiten the fossil, making its intricate structures pop under the microscope for photography.
Gentle Sieving: After a surfactant has broken down the matrix, the resulting slurry needs to be washed through a series of incredibly fine sieves. This has to be done with a gentle, slow stream of water to separate the fossils from the sediment without causing any physical damage.
These advanced methods require a ton of patience and a very steady hand. Learning how to clean fossils like these is less about brute force and more about pure finesse, ensuring these microscopic windows into the past are preserved for future study and admiration.
How to Preserve and Display Your Fossil
You've done the hard work of cleaning your fossil, but don't put your tools away just yet. The final, critical steps of aftercare are what transform a clean rock into a lasting piece of natural history, ensuring it stays stable and beautiful for years to come.
This last stage is all about preservation, documentation, and display. Skipping this part is like restoring a classic car and then leaving it out in the rain—it slowly undoes all your meticulous effort.
Applying Consolidants and Sealants
Many fossils, especially those from porous rock or ones with tiny hairline fractures, can really benefit from a protective coating. This is where consolidants come in. Think of them as specialized adhesives designed to soak into the fossil and strengthen it from the inside out.
Products like Butvar B-76, a type of resin dissolved in acetone, are a favorite among professional preparators. When you brush it on, the acetone evaporates and leaves behind a thin, protective plastic film that reinforces the fossil's structure against humidity and physical stress.
The key here is subtlety. You’re aiming for a thin, even coat that protects without leaving an unnatural glossy shine that hides all those beautiful, fine details. Always do this in a well-ventilated area, using a soft brush to let the consolidant soak in completely.
A properly applied consolidant should be almost invisible. The goal is stabilization, not encasement. When in doubt, remember less is always more.
Documenting Your Find
A fossil without its story is just a pretty rock. Good documentation is the absolute foundation of any meaningful collection, giving your specimen the vital context that adds both scientific and personal value.
Your records don't have to be overly complicated, but they should be thorough. For every fossil, it's a good practice to create a label or catalog entry that includes:
Identification: What is it? (Genus and species, if you know it).
Location: Be as specific as you possibly can. GPS coordinates are perfect.
Date Found: The day you collected the specimen.
Geological Context: The name of the rock formation, if you can find it.
Create a permanent label with archival-quality paper and ink to keep with the fossil. This simple act elevates your find from a simple curiosity into a valuable piece of data.
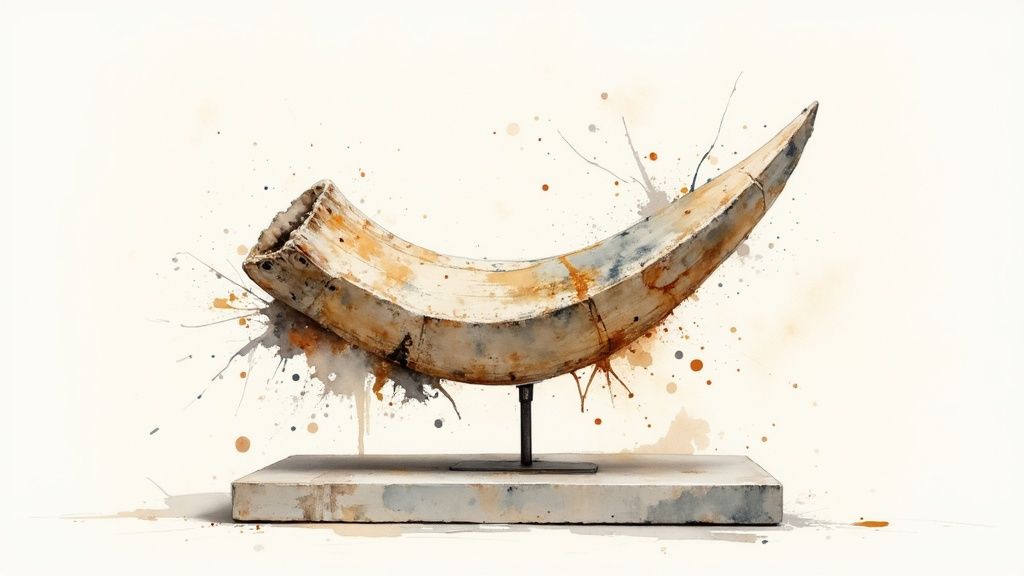
Choosing the Right Display Method
With your fossil cleaned, stabilized, and documented, it’s finally time to show it off. The right display not only highlights your work but also keeps your specimen safe from dust, damaging UV light, and accidental bumps.
For smaller, flatter specimens like trilobites, a Riker mount is a classic and affordable choice. It’s a shallow, cotton-filled box with a glass lid that works beautifully. For bigger, three-dimensional pieces, a custom stand or a dedicated spot on a sturdy shelf is a great option.
If you're getting serious about building a collection, investing in proper storage is a must. Options range from simple shadow boxes to professional-grade cases. It's worth exploring different styles of a rock collection display case to get ideas for showcasing your treasures safely and beautifully.
For larger collections, nothing beats a dedicated cabinet for protection. After all the work of cleaning and preserving, give your fossils the home they deserve. For more guidance on finding the perfect fit, our guide on choosing a display cabinet with glass offers some really valuable insights.
Common Questions About Cleaning Fossils
Knowing when to stop is a skill that comes with practice. The goal is to expose the key features of the fossil without damaging its integrity. In many cases, leaving some of the original matrix isn't just okay—it’s actually preferred, as it provides crucial context and physical support for the specimen. If you see yourself scratching the fossil surface, that’s your cue to stop immediately.
The most common mistake beginners make is getting impatient. Rushing the process almost always leads to using too much force, which can cause ugly scratches, hairline fractures, or even break a beautiful find completely. Take it slow and step away for frequent breaks.
Whatever you do, stay away from household chemicals. It's tempting to reach for something like vinegar, but this is a huge mistake. While it might dissolve some types of rock, it will also eat away at any calcite-based fossils, like shells and many marine specimens, causing irreversible damage.
Ultimately, your cleaning approach will change depending on what you’ve found. To get a better handle on your specimen's needs, it helps to know exactly what you're working with. Our guide on what the different types of fossils are can help you identify your find and choose the right method.
Whether you're just starting your collection or searching for that perfect museum-quality showpiece, Astro West offers a premier selection of ethically sourced fossils, minerals, and meteorites. Explore our curated collection and invest in a piece of natural history today at https://astrowest.com.