how to identify minerals: beginner’s guide to simple tests
Ever held a beautiful, mysterious stone in your hand and wondered what it was? You're in the right place. Identifying minerals is a bit like being a detective—you gather clues from the specimen itself to solve a puzzle, using simple tools and your own powers of observation.
Your First Steps in Mineral Identification
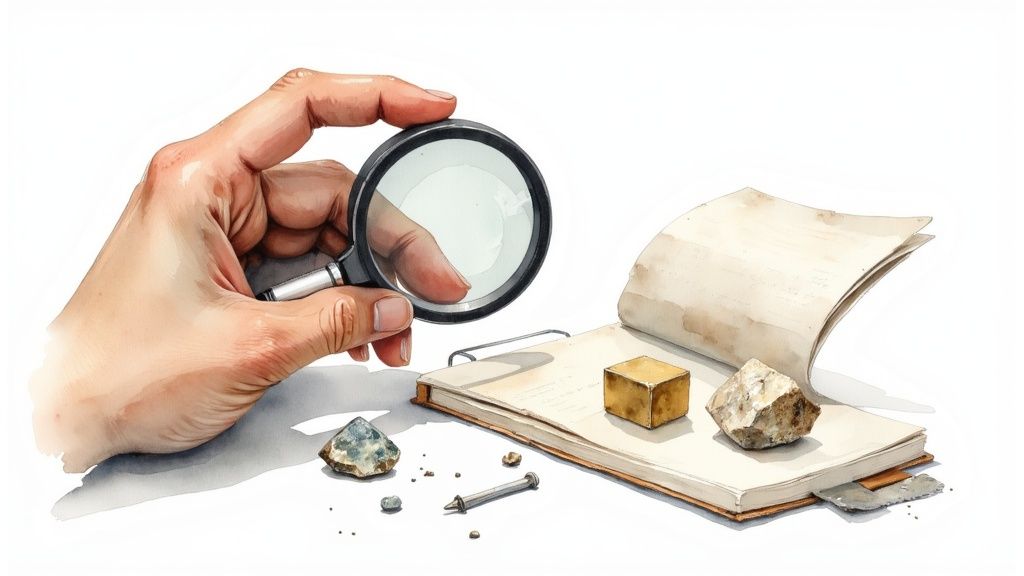
Forget the idea that you need a fancy lab. The truth is, most mineral identification happens with basic tools you probably already have lying around, like a magnifying glass, a steel nail, and a healthy dose of curiosity.
This guide is built for beginners, breaking down the process into practical, real-world steps. We'll start with the essential gear and the right mindset before moving into observing visual clues and performing simple, hands-on tests.
Think of this as your field manual for decoding the stories hidden within stones. The journey from finding an unknown rock to confidently putting a name to it is incredibly rewarding. It connects you to the Earth's deep history, turning a simple walk into a genuine treasure hunt. Building a personal mineral and rock collection starts right here, with these foundational skills.
What You Really Need to Begin
You don't need to spend a fortune on equipment to get started. In fact, a basic and highly effective kit costs very little to put together. Here are the core items that will let you perform the most critical identification tests, whether you're at home or out in the field:
A Hand Lens or Magnifying Glass: This is your window into the micro-world of a mineral. It lets you see the fine details of its crystal structure, texture, and any tiny inclusions. A 10x magnification is the standard for most geologists and serious hobbyists.
A Steel Nail or Pocket Knife: This is for testing a mineral's hardness, one of the most reliable identifying properties you can check. It's a classic field test for a reason.
An Unglazed Porcelain Tile: This is for the "streak test." When you scratch a mineral across its surface, it reveals the color of its powder. This streak is often a different and more consistent color than the mineral's outward appearance.
A Small Bottle of White Vinegar: This is a safe and simple way to test for carbonate minerals. If you have calcite, for example, it will fizz when a drop of weak acid is applied.
The most powerful tool in your kit is your own power of observation. Learning to look closely and systematically at a specimen is a skill that will serve you better than any piece of equipment.
This simple kit is all that stands between you and uncovering the identity of your found treasures. With these tools in hand, you're ready to start gathering the clues that will lead you to a positive identification. This guide will walk you through exactly how to use each one.
Decoding a Mineral's Visual Clues
The moment you pick up a new mineral, your identification journey has already begun. The best first step is always the simplest one: just look at it. Turn it over in your hands, get it under some good light, and let your eyes do the initial work. This first pass is surprisingly effective.
Your eye will probably go straight to the color, but be careful—it's often the most deceptive clue. While a brilliant color is what makes a specimen jump out, it can easily lead you down the wrong path. Just look at quartz. It comes in a whole rainbow of varieties, from the deep purple of amethyst to the sunny yellow of citrine, all thanks to tiny chemical impurities. They look completely different, but they're the same mineral.
Look Beyond the Surface Color
A far more trustworthy clue is luster, which is just a fancy word for how light bounces off the mineral’s surface. It has nothing to do with the color itself, but everything to do with the quality of the reflection. Think of it as the mineral's unique brand of shininess.
Learning to spot different lusters is a core skill. Does your specimen have the gleam of polished chrome? That's a metallic luster, which you'll see on minerals like pyrite and galena. If it looks like a piece of glass, you're seeing a vitreous (or glassy) luster. This is the most common type out there, found on everything from quartz to fluorite.
To help you get the hang of it, here’s a quick rundown of common luster types you'll encounter in the field.
Quick Guide to Mineral Luster Types
Luster Type
Description
Common Mineral Example
Metallic
Opaque and reflective, like polished metal.
Pyrite, Galena
Vitreous
Reflects light like glass; the most common luster.
Quartz, Fluorite
Pearly
A soft, iridescent sheen, similar to a pearl.
Talc
Silky
A soft, fibrous glow from parallel fibers.
Satin Spar Gypsum
Earthy
Dull and non-reflective, like chalk or dry soil.
Kaolinite
Once you start looking for these subtle differences in reflection, you’ll be amazed at how quickly you can narrow down the possibilities for an unknown specimen.
The Importance of Crystal Shape
Next, take a close look at the mineral's crystal form, also known as its habit. This is the natural, geometric shape a mineral grows into, and it's dictated by its internal atomic structure. Don't worry, you don't need a degree in crystallography to start recognizing the common forms.
With just a little practice, distinctive shapes will start to pop out. Pyrite, or "fool's gold," is famous for forming almost perfect cubes. Quartz often grows into beautiful six-sided prisms with a sharp point. And garnets? They frequently show up as multi-sided, soccer ball-like crystals.
Getting a handle on these basic physical properties is the bedrock of field geology. In fact, seasoned geologists rely on visual observations and simple hands-on tests for about 90% of mineral identification in the field. You can dig deeper into these foundational methods through mineralogy research.
Even if a crystal is broken or incomplete, you can still find clues in its overall structure. Training your eye to spot these geometric patterns is one of the most satisfying parts of mineral collecting. These three visual clues—color, luster, and crystal form—give you the first, and biggest, pieces of your identification puzzle.
Performing Hands-On Identification Tests
Just looking at a mineral will only get you so far. To really figure out what you’re holding, you have to get your hands dirty. A few simple physical tests can reveal a mineral's secrets—things like its internal structure and chemical makeup—giving you the final clues you need for an accurate ID. These tests are the bedrock of mineralogy for a reason. They just work.
The first, and maybe most telling, is the streak test. This classic test reveals the true color of a mineral by showing you the color of its powder. All you do is firmly scratch your specimen across an unglazed porcelain plate. Hematite, for instance, might look black or silvery to the naked eye, but it always leaves a tell-tale reddish-brown streak.
That one simple action can solve mysteries that surface color alone creates, making it one of the most reliable tests in your toolkit.
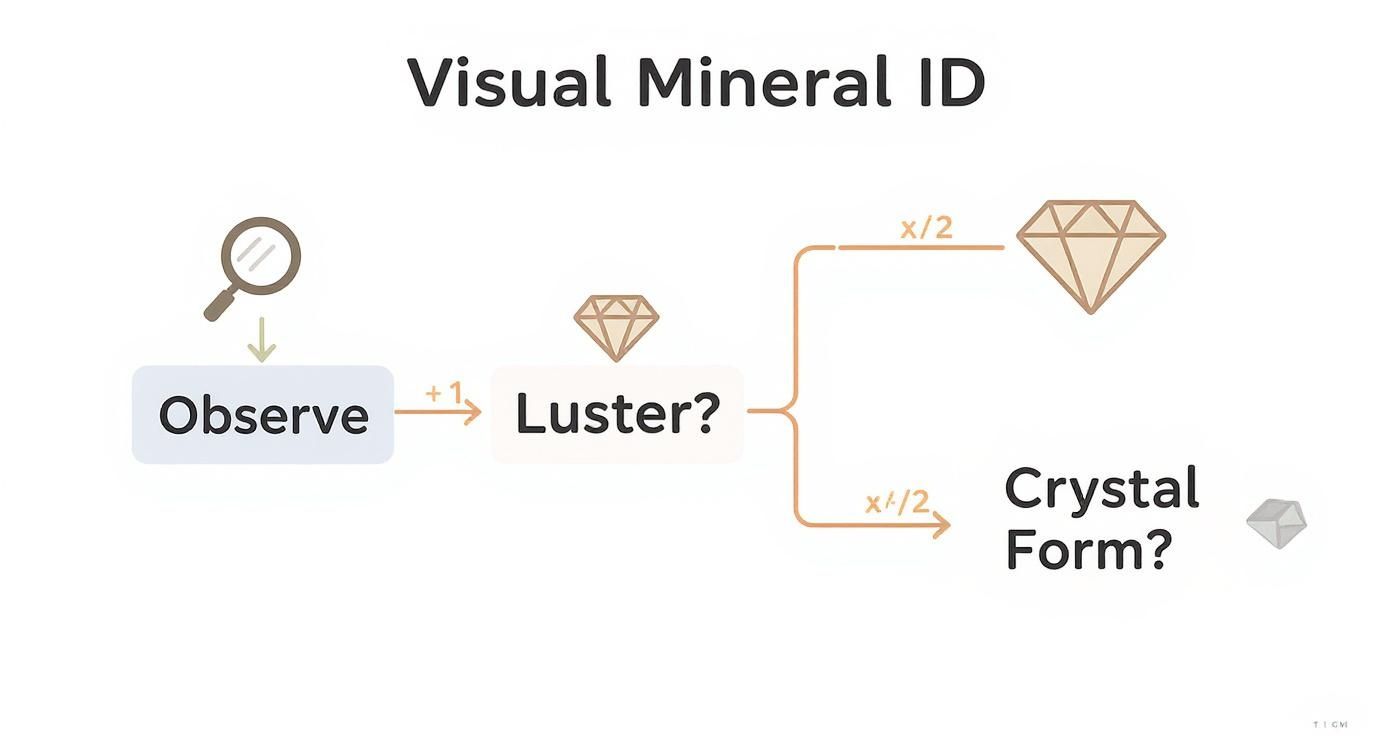
This handy decision tree shows how visual clues like luster and crystal form can get you started, setting the stage for these hands-on tests.
As the infographic points out, after a quick visual check, nailing down a property like luster can immediately narrow down the possibilities, pointing you toward the next logical test.
Testing a Mineral's Hardness
Once you've checked the streak, it's time to figure out its hardness. This isn't about how easily a mineral shatters; it’s about its resistance to being scratched. Geologists measure this using the Mohs Hardness Scale, which ranks ten common minerals from 1 (Talc, the softest) to 10 (Diamond, the hardest).
You don't need a full set of Mohs minerals to do this, though. You can actually use common objects with a known hardness to figure out where your specimen lands on the scale. This process of elimination is surprisingly effective.
Here are a few go-to items for a quick field test:
Your Fingernail: Has a hardness of about 2.5. If you can scratch the mineral, you know it's quite soft.
A Copper Penny: Comes in at around 3.5. If your fingernail can't scratch it but a penny can, you're getting warmer.
A Steel Knife Blade: Registers at approximately 5.5. This is a great benchmark for many common minerals.
A Piece of Quartz: With a hardness of 7, quartz can scratch steel and is an excellent tool for testing tougher specimens.
By systematically trying to scratch your mineral with these items (and seeing if your mineral can scratch them), you can bracket its hardness and get much closer to a positive ID. For more examples, our detailed crystal identification guide shows how hardness and other properties work together.
How a Mineral Breaks: Cleavage vs. Fracture
Finally, pay close attention to how your mineral breaks. This tells you all about its internal atomic arrangement. A mineral's break pattern falls into one of two main categories: cleavage or fracture.
Cleavage happens when a mineral breaks along flat, smooth planes. These are natural weak spots in its crystal structure. Think of how mica peels away in perfect, paper-thin sheets. Halite (table salt) is another great example, breaking into smaller and smaller cubes that mimic its original crystal form. These breaks often have a reflective, almost shiny surface.
A mineral's cleavage is a direct reflection of its internal atomic lattice. Those flat planes you see are where the bonds between atoms are weakest, making it a highly predictable and useful diagnostic property.
On the other hand, fracture is what we call a break that is uneven and not along a flat plane. If you see curved, scoop-shaped surfaces like on broken glass, that’s called conchoidal fracture—a classic trait of quartz. Other minerals might have a fibrous, splintery, or just plain irregular fracture.
These hands-on tests—streak, hardness, and break pattern—move you beyond surface appearances to reveal the true nature of your find.
Using Simple Chemistry and Digital Tools
While the physical tests give you a great sense of a mineral's structure, sometimes you need to peek at its chemical makeup to be certain. Luckily, you don't need a high-tech lab for one of the most classic and decisive chemical tests in mineralogy. A simple, safe experiment at home can give you a clear answer for an entire class of minerals.
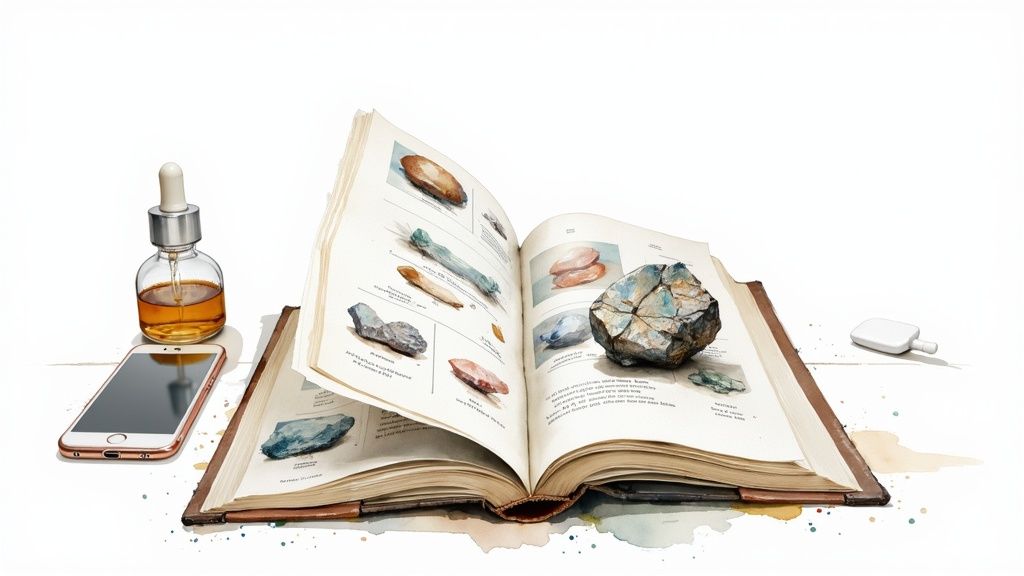
This is the famous acid test, and you can do it with a drop of household white vinegar. Just place your specimen on a plate and apply a single drop. If you see a distinct bubbling or fizzing, you've just confirmed you have a carbonate mineral. Calcite is the prime suspect here.
That fizzing reaction is a dead giveaway for rocks largely composed of calcite, such as limestone and marble. It’s a simple, immediate clue that tells you everything you need to know about the mineral's fundamental chemistry. Keep in mind that some carbonates, like dolomite, are a bit more stubborn and might need to be powdered slightly—just scratch the surface—to react with a weak acid like vinegar.
Tapping Into Modern Identification Technology
When simple tests don't cut it, modern tools can step in to solve even the trickiest mineral mysteries. While professional geologists use advanced equipment like X-ray diffraction (XRD) in their labs, powerful digital resources are becoming increasingly available to hobbyists like us.
These tools help bridge the gap between what you can see in the field and what precise scientific analysis can tell you. One of the most exciting developments comes from researchers who have created free, accessible platforms that use chemical data to automate the identification process. This is a huge leap forward for anyone trying to identify a mineral without a lab.
Today's advanced mineral identification often comes down to chemical composition. A recent innovation from Rice University researchers introduced MIST—Mineral Identification by Stoichiometry—a free online tool that automates mineral identification using chemical data, hitting an accuracy rate of about 88.4% in tests. It's a fascinating look at where the technology is headed.
Finding Help From Online Communities and Apps
Beyond academic tools, there's a whole world of digital resources to support your journey. Several mobile apps let you identify minerals just by taking a photo, using image recognition to suggest possible matches. They can be a fantastic starting point, though you should always try to confirm their suggestions with your own physical tests.
Never underestimate the power of the community. Online forums and social media groups, like the popular subreddit r/whatsthisrock, connect you with a global network of experienced collectors. Posting clear photos along with your test results can bring in expert opinions to help you solve a tough identification. These communities are incredibly supportive and full of members who are genuinely eager to share their knowledge. This approach is especially useful for distinguishing between tricky lookalikes—a common challenge you can read about in our guide on how to tell gold from pyrite.
Putting It All Together With Reference Guides
You’ve done the hands-on work—you've checked the luster, tested the hardness, and examined the streak. Maybe you even tried a fizz test. But what do all those little clues actually tell you?
This is where your detective work really pays off. No one, not even a seasoned geologist, identifies every mineral from memory alone. The final, crucial step is to take your findings and cross-reference them with reliable guides.
Think of it like matching a fingerprint to a database. By comparing your list of observed properties against a trusted resource, you can start to systematically eliminate the possibilities and zero in on your mineral’s true identity.
A good field guide or an online mineral database will organize specimens by their key traits. For example, if your mystery rock is glassy, has a hardness of around 7, and leaves no colored streak, you can immediately narrow your search to candidates that fit that profile, like quartz.
Considering Geological Context
Beyond the physical tests, one of the most powerful clues is geological context. In simple terms: where did you find it? Minerals don't just pop up randomly; they form under very specific geological conditions. Knowing the history of the area can dramatically shrink your list of potential suspects.
Was your sample found in a riverbed, near an old volcano, or in a limestone quarry? Each of these environments is known for producing its own unique suite of minerals. For instance, finding agates is common in Michigan's Keweenaw Peninsula, an area shaped by ancient lava flows. You wouldn't expect to find the same things in a limestone deposit in Florida.
Understanding the local geology is like having a cheat sheet for mineral identification. If you know you're in a copper-rich region, you can prioritize testing for copper-bearing minerals.
This context provides a crucial layer of evidence. It helps you distinguish between two minerals that might have similar physical properties but form in completely different environments. Learning more about the differences between common minerals, like in our guide comparing calcite and quartz, can further sharpen these skills.
Using Trusted Online Resources
While physical field guides are fantastic, online databases offer powerful and quick search capabilities. Websites from geological surveys and university mineralogy departments are invaluable for cross-referencing your test results.
Combining your hands-on test results with location data and trusted guides is how you complete the puzzle. You'll move from holding an "unknown rock" to confidently putting a name to your find.
Common Questions From New Rockhounds
As you start your journey into mineral identification, you're going to have questions. Everyone does. Think of them as signposts, not stop signs. We hear a lot of the same queries from beginners, so let's clear up some of the most common ones to get you moving forward with confidence.
What Is the Difference Between a Rock and a Mineral?
This is the big one, and it's a fantastic question. The easiest way to think about it is like this: minerals are the ingredients, and rocks are the finished recipe.
A mineral is a naturally occurring solid with a very specific chemical makeup and an orderly internal structure. Quartz, for example, is a single mineral. A rock, on the other hand, is a mash-up of one or more minerals. Granite is a perfect example of a rock—it's made of several different minerals squished together, including quartz, feldspar, and mica.
Why Is a Mineral’s Color So Unreliable for Identification?
Color is the first thing we all notice, but in the mineral world, it's often a total red herring. It's just not a trustworthy clue. So many minerals come in a rainbow of different colors, usually because of tiny chemical impurities.
Take quartz, for instance. It can be purple (amethyst), yellow (citrine), or pink (rose quartz), but it's all the same mineral underneath. To make things more confusing, completely different minerals can show up in the very same color. This is exactly why seasoned collectors and geologists immediately turn to more consistent properties like streak, hardness, and cleavage to get a positive ID.
One of the most common mistakes new rockhounds make is relying too heavily on a specimen's surface color. Learning to prioritize other physical tests is the fastest way to improve your identification accuracy.
Do I Need Expensive Gear to Start Identifying Minerals?
Absolutely not! This is one of the best parts about getting into rockhounding. You can put together a super effective field kit for next to nothing. Your most important tools will always be your own curiosity and a sharp pair of eyes.
You really only need a few simple things to get started:
A hand lens or a basic magnifying glass to get a closer look at the fine details.
A steel nail or a pocket knife for testing hardness.
A copper penny, which has a known hardness of around 3.5 on the Mohs scale.
A small piece of unglazed porcelain tile to perform streak tests.
This basic kit gives you everything you need to perform the most critical ID tests right there in the field. It's proof that you don't need a professional lab to start solving your own mineral mysteries.
At Astro West, we believe that every stone has a story to tell. Whether you're just starting your collection or searching for a museum-quality centerpiece, our ethically sourced minerals, fossils, and jewelry offer a tangible connection to our planet's incredible history. Explore our curated selection and find your next treasure at https://astrowest.com.