There's a special kind of magic in cracking open a geode. You're transforming what looks like an ordinary, unassuming rock into a dazzling cave of crystals, being the very first person to see a hidden world that's been sealed away for millions of years.
It’s part science, part treasure hunt, and a completely hands-on way to connect with the earth's natural art. Whether you uncover the deep purple of an amethyst or the clear sparkle of quartz, each geode holds a one-of-a-kind surprise. You can learn more about the fundamentals in our article that explains what a geode is.
This guide is your companion on that journey of discovery. We'll walk you through everything, from picking a promising geode to the best ways to open it safely and successfully.
From Simple Rocks to Crystal Caves
What makes these hollow rocks so special? Geodes are geological time capsules, preserving incredible natural histories within their crystalline structures. They aren't just pretty objects; they're a record of ancient environments.
The world's largest known geode, the Pulpí Geode in Spain, is a perfect example. Its oldest crystals formed between 2 and 5.6 million years ago in water around 100 °C, a testament to the immense time and specific conditions needed to create these wonders. You can explore the fascinating story of how this massive geode grew on Science.org.
Our goal is to give you a straightforward, safe approach to cracking your own geodes. We’ll show you how to turn that plain-looking stone into a beautiful display piece you can be proud of.
Finding the Right Geode and Staying Safe
Before you can get to the fun part—cracking open a geode—you need to pick a good candidate. Not every round rock is hiding a crystalline secret, but a few tell-tale signs can point you toward one with serious potential.
First, look at the exterior. You're searching for a rock with a lumpy, bumpy surface, almost like a head of cauliflower. A promising geode will also feel surprisingly light for its size, which often means it's hollow inside. For the final test, gently shake it next to your ear. If you hear a faint rattle from loose crystals, that’s an excellent sign you're holding a true geode and not just a solid nodule.
Essential Safety Gear and Setup
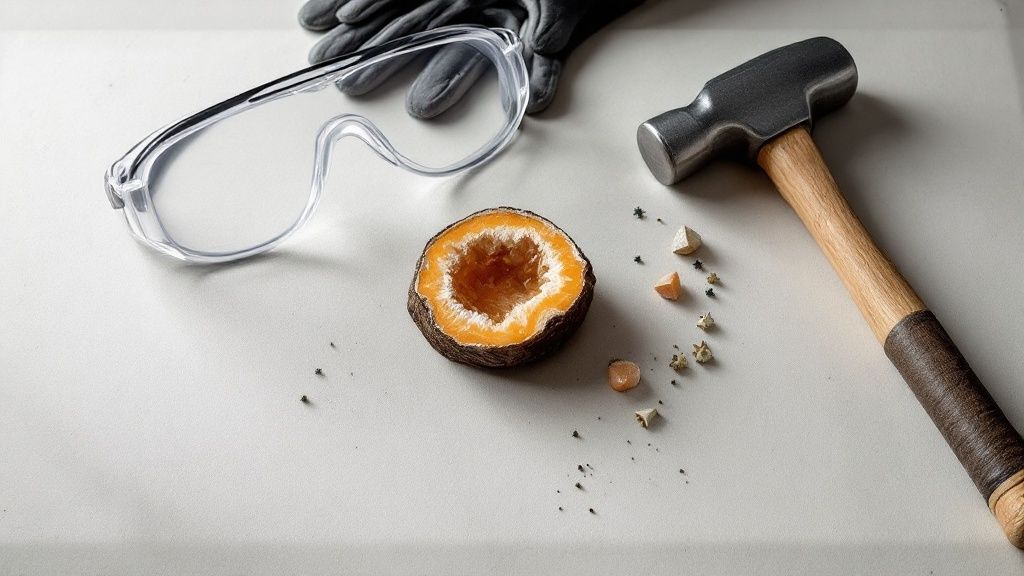
Once you've picked your geode, let's talk about safety. This is non-negotiable. Rock fragments can fly off with surprising force, so having the right protective gear is absolutely critical for an injury-free experience.
Your safety kit should always include two key items:
Impact-Resistant Goggles: Don't rely on your everyday eyeglasses. You need ANSI-rated safety goggles that fully cover your eyes to shield them from high-velocity debris.
Sturdy Gloves: A good pair of thick leather or canvas work gloves will protect your hands from sharp, freshly broken edges and the occasional misplaced hammer strike.
A controlled environment is just as important as the right gear. Always work on a stable, solid surface outdoors, like a concrete patio or a large, flat rock. This prevents the geode from slipping and ensures you have a predictable and safe cracking process.
Setting up in a clear, open area also minimizes the risk of flying shards hitting windows, cars, or other people.
After you’ve successfully opened your geode, the next adventure is figuring out what's inside. Our comprehensive crystal identification guide can help you determine if you've found quartz, amethyst, or another beautiful mineral. Taking these simple precautions ensures your geode cracking adventure is memorable for all the right reasons.
Choosing Your Geode Cracking Tools
The tool you pick to crack open a geode is the single biggest factor in what the final result will look like. It’s a classic trade-off: control versus convenience. Are you hoping for a clean, display-ready pair of halves, or are you just excited to see what’s hidden inside? The right tool really just depends on your goal.
For those of us who want a controlled, precise break, the hammer and chisel combination is the timeless choice. This method lets you carefully score a line around the geode’s middle, essentially guiding the fracture exactly where you want it. It takes some patience, but the reward is often two beautiful, symmetrical halves that are perfect for showing off the crystals inside. It's the go-to technique if you want to preserve the geode's natural beauty.
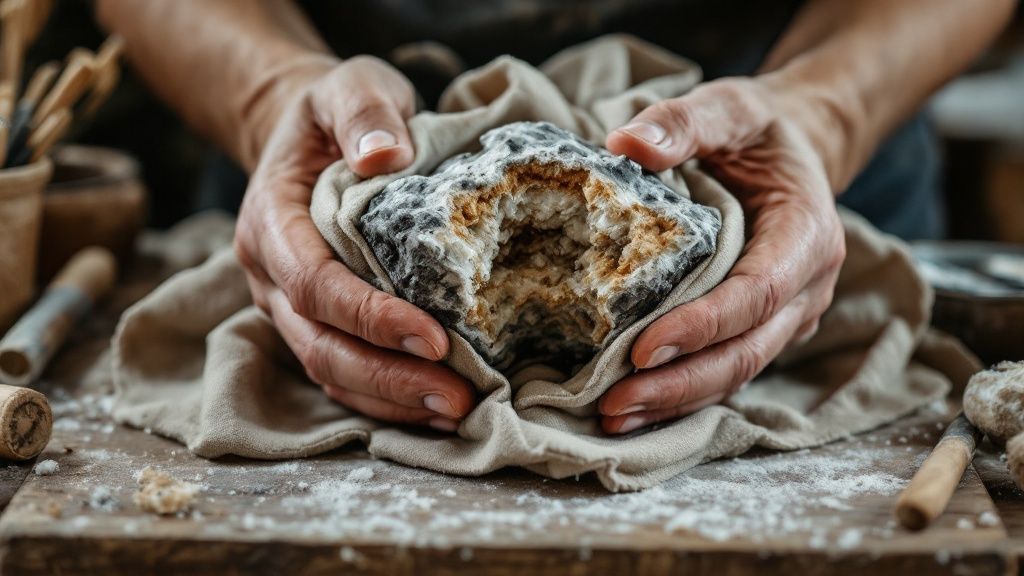
The Sock and Hammer Technique
For a simpler, more direct approach, many rockhounds swear by the sock-and-hammer method. It’s exactly what it sounds like: you place the geode inside a sturdy sock or fabric bag to catch any flying shards and then give it a firm whack with a rock hammer.
This has historically been one of the easiest ways to get a geode open, especially for beginners who don't have specialized gear. Be warned, though—it often results in a shatter, leaving you with irregular chunks rather than a clean split. Sometimes, this can even damage the delicate crystal formations inside. You can learn more about this traditional method over at Rockseeker.com.
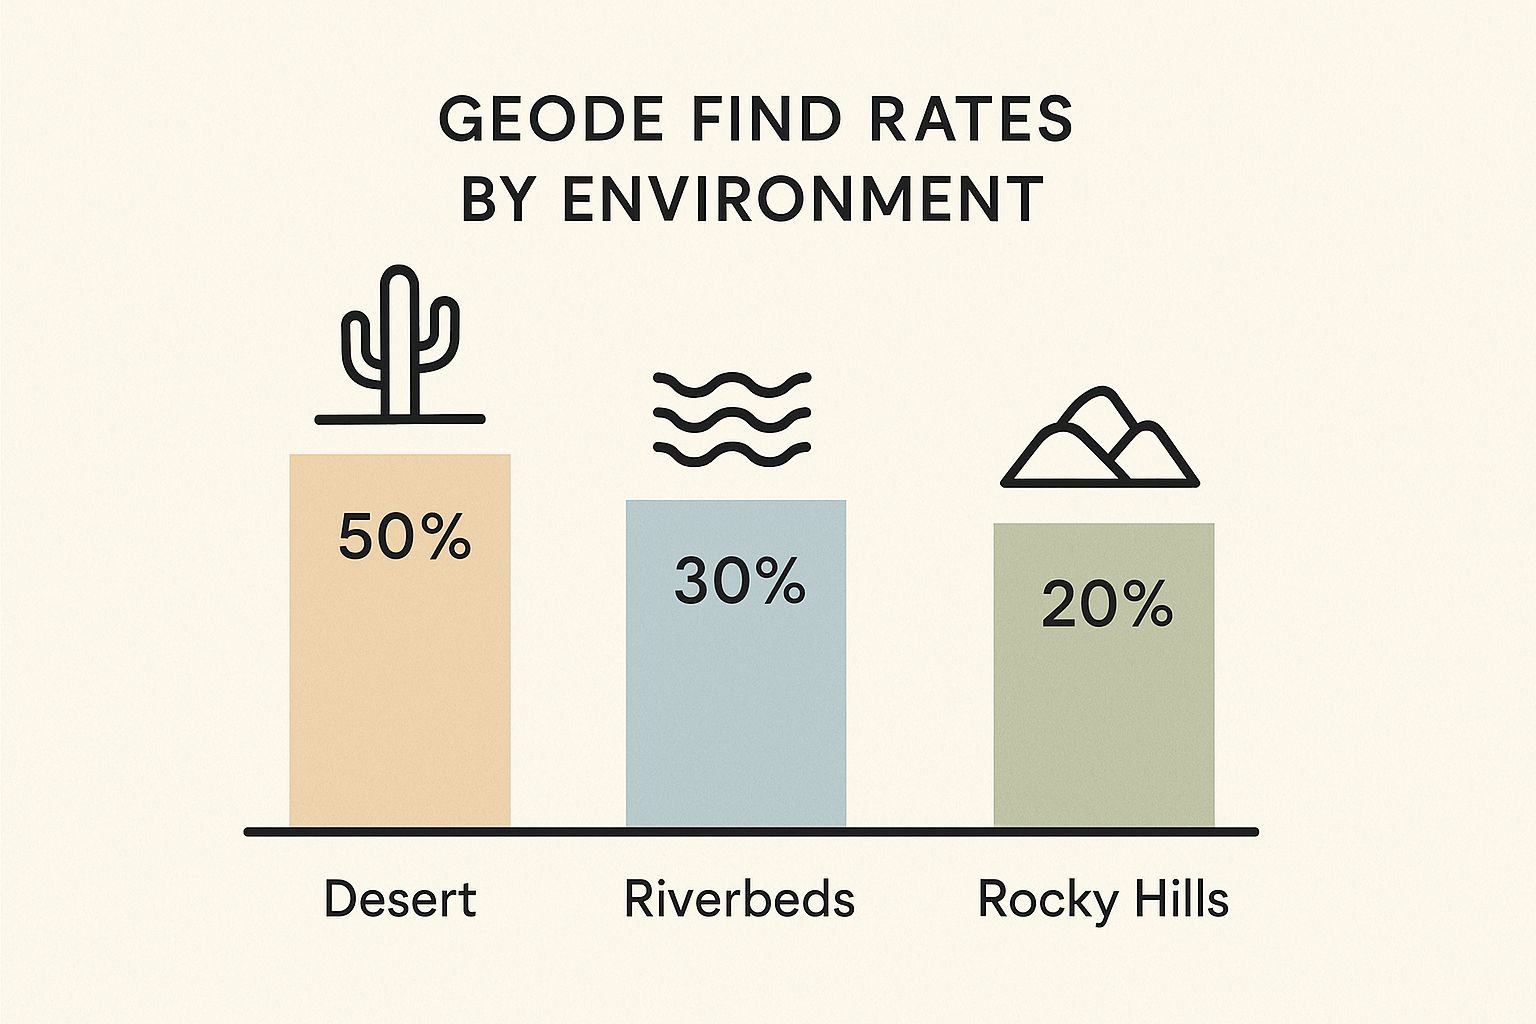
The infographic below shows where geodes are typically found, which can give you a hint about the type you might be cracking.
As you can see, deserts are hotspots for geode hunting, making up 50% of all discoveries. It’s no wonder they’re a favorite location for rockhounds.
Professional and Advanced Tools
If you’re aiming for a flawless, museum-quality cut, you’ll need to step up to professional-grade equipment. Tools like soil pipe cutters (also known as chain cutters) offer an incredible amount of precision. You just wrap the chain around the geode and tighten it until the pressure creates a clean, even snap right along the line.
For the absolute cleanest cut, a diamond saw is the ultimate tool. Often used by lapidary artists, these saws can slice through the hard outer rind of a geode with incredible accuracy, producing a perfectly smooth surface that requires minimal polishing.
While these tools are highly effective, they’re also a serious investment and are typically used by dedicated collectors or professionals. For most beginners just learning how to crack geodes, a trusty hammer and chisel offers the best balance of control, affordability, and satisfying results.
Geode Cracking Method Comparison
To help you decide, here’s a quick breakdown of the most common cracking methods. Each has its pros and cons, depending on what you're trying to achieve.
Method
Tools Needed
Expected Break
Best For
Hammer & Chisel
Rock hammer, flat chisel, safety glasses
A fairly clean, two-piece break
Beginners and hobbyists wanting a display piece
Sock & Hammer
Heavy sock/bag, rock hammer, safety glasses
Multiple irregular pieces, often shattered
Quickly opening geodes when the shape doesn't matter
Soil Pipe Cutter
Soil pipe/chain cutter, safety glasses
A very clean, precise snap
Serious collectors aiming for perfect halves
Diamond Saw
Wet lapidary saw, safety glasses, water source
A perfectly smooth, polished-looking cut
Professionals creating high-end display pieces or jewelry
Ultimately, the best method comes down to your personal goals and the tools you have available. There's no single "right" way—just the right way for you and your geode.
How to Open a Geode with a Hammer and Chisel
This is where patience and technique come together to get that perfect, display-worthy break. Using a hammer and chisel is my go-to method for achieving two clean halves, but it's all about precision, not brute force. If you just go at it with all your strength, you'll end up with a pile of shattered rock. The real key is a gentle, methodical approach.
First things first: safety. Get your safety goggles and gloves on. Then, find a solid, stable surface that can take a bit of a beating, like a concrete step or a flat patch of ground. You'll want to avoid surfaces like wood or glass that you could end up damaging.
Creating the Guide Line
Your first job is to create a "score line" around the geode's circumference. Think of it as drawing a map for the crack to follow.
Hold the chisel at a slight angle against the geode's equator and give it a firm but gentle tap with your hammer. You're not trying to split it on the first hit. Instead, you're just making a small indent. Rotate the geode a little, tap again, and connect this new mark to the first one. Keep doing this—tapping and rotating—until you have a complete, shallow groove all the way around the rock.
This score line is easily the most important part of the whole process. It weakens the geode along a very specific path, encouraging a clean break instead of a random, messy shatter.
Pro Tip: Listen closely to the sound your hammer makes. As you tap along the score line, you'll eventually hear a change. It'll go from a dull thud to a higher-pitched, more resonant sound. That subtle shift is your signal that a fracture has started to form inside.
Applying Even Pressure
Once your guide line is set, you can keep tapping along it, this time with a little more force. The trick here is to distribute the pressure evenly. Don't just hammer one spot over and over. Keep rotating the geode.
This gradual, rotational tapping is what separates a clean split from a disappointing break. Every tap sends a small shockwave through the rock. By working your way around the score line, you ensure those tiny fractures meet right in the middle.
Eventually, one of those taps will be the one. You'll feel the geode give way and split neatly into two beautiful halves. That moment of discovery is what makes this whole thing so rewarding. You've just revealed a hidden crystal world that’s been waiting millions of years to be seen. It's an unforgettable bit of geological discovery, right in your own backyard.
Displaying and Valuing Your Geode Crystals
So, you’ve cracked your geode and revealed the treasure inside. Now what? The final step is all about making those crystals sparkle. A quick, gentle cleaning with some warm water and a soft-bristled brush is usually all it takes to clear away any lingering rock dust from the big reveal.
Once they're clean and dry, your geode halves are ready to shine as one-of-a-kind pieces of natural art. They look incredible on a bookshelf, make for seriously cool bookends, or can even become the centerpiece on a coffee table. For a little more inspiration on showing off your finds, take a look at our guide on how to display crystals in your home.
Determining Your Geode's Worth
Figuring out what a geode is worth comes down to a few key factors. The most important? The type of crystal inside. A geode filled with vibrant amethyst or a more unusual formation will always command more attention than one with simple, clear quartz.
The price range for geodes is enormous. While a small, baseball-sized specimen might cost only $4–$12, a ton of high-quality material can be worth anywhere from $13,608 to nearly $6.8 million. Discover more insights about geode valuation on Rockchasing.com.
Beyond the crystal type, here are a few other things that determine value:
Color Intensity: The deeper and more saturated the color, the more desirable the geode.
Crystal Size: Bigger, well-formed crystal points add a ton of value.
Symmetry: A nice, clean break and a beautifully formed hollow cavity just make the geode more appealing.
At the end of the day, though, every single geode you crack open is a personal discovery—a unique treasure that's been millions of years in the making.
Common Questions About Cracking Geodes
Even with the best instructions, a few questions always pop up when you're learning the ropes of geode cracking. Let's tackle some of the most common ones to make sure your experience is a blast from start to finish.
One of the biggest worries for first-timers is the anticlimax of a solid rock. What happens if your geode isn't hollow?
What if My Geode Is Solid Inside?
It happens more often than you'd think! Sometimes you'll find a solid agate or quartz core instead of a hollow cavity. Don't be disappointed—this is what’s called a nodule.
While it's not the crystal-lined pocket you might have pictured, these solid nodules are often polished to reveal beautiful, intricate banding and colors. They are a unique find in their own right.
Another frequent question is about using everyday tools for this special task.
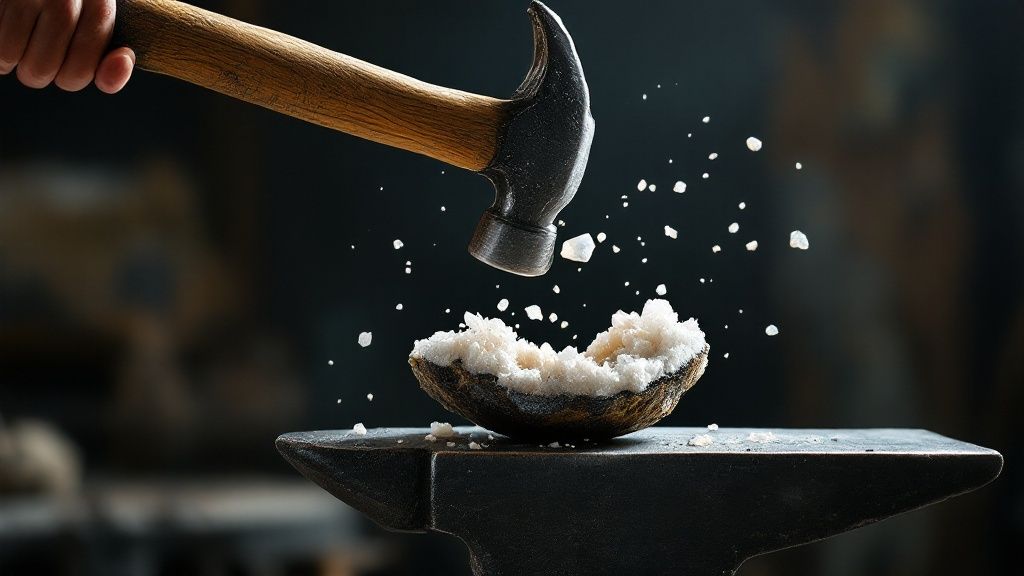
Can I Just Use a Regular Hammer?
You can, but it’s not the best—or safest—choice. A standard claw hammer from your garage is made of softer steel. When you strike a hard rock with it, the hammer itself can chip or even send tiny metal shards flying.
A rock hammer or a small sledgehammer is the way to go. They’re built from hardened steel specifically designed for that kind of high impact, making them much safer and more effective.
The real magic of cracking geodes lies in the surprise. You never truly know what's waiting inside until that final crack reveals the hidden treasure.
Finally, the most exciting question of all is about the crystals themselves.
How Can You Tell What’s Inside Before You Open It?
That's the mystery and the fun of it—you can't know for sure! However, a geode's origin offers some big clues. A little research goes a long way.
For example:
Geodes from Brazil and Uruguay are famous for their stunning amethyst.
Many from Mexico contain calcite or shimmering drusy quartz.
Knowing where your geode was found can give you a pretty good hint of the treasure waiting inside.
At Astro West, we believe every geode tells a story millions of years in the making. Whether you're a curious beginner or a seasoned collector, find your next adventure with our ethically sourced minerals, fossils, and more. Explore our curated collection at https://astrowest.com.